 Would you like to see who is calling your mobile on your PC? Are you in an environment where your phone has to be silent? Do you miss calls?
This walkthrough will show you how to connect your Windows Mobile 5 Smartphone to your Windows XP PC via Bluetooth. This is likely to work for most Bluetooth phones and all operating systems that support Bluetooth though the method will be slightly different on other platforms.
This method also works for Windows Vista. I have not had success in getting caller ID information, but a message does show up on the screen saying that there is an incoming call. Be careful not to attach Vistas voice gateway service as your calls will be answered automatically. To get this going in Vista, follow the steps below as the set up for Vista and XP are almost identical.There are heaps of fun and interesting things you can do with Bluetooth. Check out some of my other How-To’s and have a play.
Bluetooth has many services which you can use. For this How-to I am only going to focus on the hands-free service, although part of this process is the pairing of the devices. Each Bluetooth device offers only a few services but all smartphones I have seen offer the hands-free service.
Not all bluetooth adaptors will allow for the use of the hands-free service. It works with my Belkin adaptor but it has not been possible on some laptops I have come across. To find out if your PC is capable, open up “My computer”, click “My Bluetooth Places”, click “View my Bluetooth Services”. Look for Hands-free or Headset profile and you should be alright. This may also be dependent on your drivers.
One of the drawbacks with Bluetooth is that it drains the battery of your device whilst it is switched on. My batteries lose power twice as fast with it on and connected to another device. This is slightly annoying but if you are willing to charge your phone ever 1-2 days, you will be fine. You probably have these features, so you may as well see if you can use them.
What you need:
- Windows Mobile 5 Bluetooth handset.
I will be using a HP Ipaq rw6828, as companies make changes to WM5, some of the menu’s may look different.
- PC/Laptop running Windows XP
Up to date, Service Pack 2 is probably required
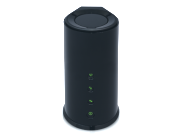
- Bluetooth built-in to your laptop or a Bluetooth USB Adaptor.
I am assuming drivers have been installed on the computer for the Bluetooth ready PC or Laptop.These are available in most IT shops and range in price greatly. I use a Belkin Bluetooth USB Adaptor – Model F8T013 I bought at Harvey Norman. No name brand adaptors can be found at local computer shops for around $20, though I have no idea if these will offer the hands-free service.
Pairing the Smartphone with your Computer.
In order to use the Hands-free service we first need to pair the Smartphone with your computer. This enables the Bluetooth communication between the two devices.
On your WM5 Smartphone, tap on the following buttons
tap Bluetooth

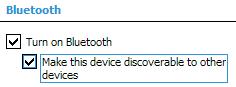 tap Mode,
both boxes should be ticked, this turns Bluetooth on
Your Smartphone will now scan the area for Bluetooth devices and list them
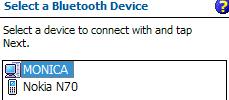 tap “Your computer’s name” and press Next
Your Smartphone will now ask you to enter a passkey. This is a code that you put in to allow for a secure connection between your Smartphone and your computer. You make this key up in most cases and if you do forget it in the future, you can re-pair the devices. They are usually 4 characters long and numeric. I usually use 1234 or 9876. Another option is to use the last 4 digits of a phone number associated with the mobile phone. I don’t see there being huge security issues here but if you have sensitive data on your Smartphone you may want to look into Bluetooth security.
 Enter your passkey, e.g. 1234 or 2435
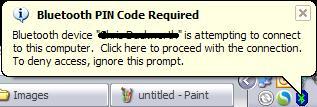
Your PC will request the Passkey. Click on the bubble popup
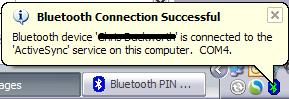
You should see that your connection is successful. Icon will change to aqua.
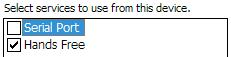 Back on your Smartphone: select Hands-Free Service
Setting your Computer as the Hands-free device
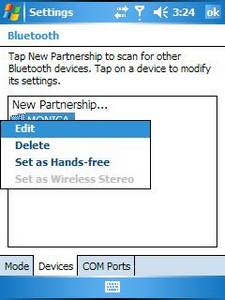
You will be sent back to your partnerships list and your device should now see your computer in the list. Tap on “Your Computer Name” for 2 seconds and a menu will pop up. Select “Set as Hands-free”
 If all has gone to plan you will now be able to accept calls to your mobile through your PC. When the mobile is dialled a popup will appear down the bottom right of the screen displaying the number.
Not only that, if you click on the bubble you will be given the option to Accept or Reject the call.

Your smartphone should reconnect automatically when you are near the computer, my computer reconnects with my phones automatically saving me from having to manually set hands free.


