It goes without saying
that Square has revolutionized payment processing for many a small
business—but it's not the ideal solution for every small business.
For one thing, it doesn't accommodate cash. For another, it doesn't
print receipts (not without a third-party printer, that is). And it
requires you to own a smartphone or tablet, hardware not every business
owner can afford.
If you're looking for a more traditional point-of-sale system, but with Square-like pricing, check out GoPago Live. It's a soup-to-nuts POS setup that's absolutely free.
Update: GoPago Live now charges $99 per month.
Yeah, I was skeptical, too, but there's no catch that I could find.
Instead, there's something of an embarrassment of riches in what the
company offers.
GoPago Live comes with an Android-powered tablet, a tablet stand with
credit card reader, a cash drawer, a receipt printer, and, perhaps most
amazing of all, a free 4G data plan courtesy of Verizon.
Once again, there's no charge for any of this. Your only expense is a
per-transaction fee of 2.85 percent—and that applies only to
credit-card transactions, not cash. (Customers can also use the GoPago
app to make mobile payments.) There are no other charges, no monthly
fees.
Granted, Square charges 2.75 percent per transaction, and other
payment-system providers have rates slightly lower than that. But a few
tenths of a percent probably isn't make-or-break for most businesses,
especially considering what you stand to save if you're replacing a
provider that fees you to death.
You can, of course, customize GoPago's payment software for your
business's products and services, and the system offers to promote your
business via Facebook, Twitter, and your customers' smartphones.
Because I don't run a POS business, I can't really put GoPago to the
test. If you've had a chance to try it yourself, or you can see any
reasons why it's not as sweet as it sounds on paper, let's hear from you
in the comments.
Introducing new
software into a typical small business environment can be costly, to say
the least. Depending on the size of your business, buying multiple
copies of a program—or its licenses—can quickly drive your balance sheet
into the red.
The alternative isn’t especially appealing, however. Sifting through
the Web in the hopes of finding an effective no-cost software solution
could wind up costing a small business just as much time, money, and
manpower to use effectively as it would have cost to buy a fully
functional app in the first place.
What’s a business owner on a budget to do? Simple: Read this article.
Below, you’ll find 10 superb pieces of software that can increase
productivity without decreasing your bank account. We included options
for most major business functions—from productivity to human resource
management to the operating system itself—in an effort to create a
front-to-back resource for getting your business up and running for the
low, low cost of nada.
A word of warning, however: Free software isn’t always the deal it
appears to be. While premium software typically comes with frequent
updates and a helpful support staff that’s just a phone call away, gratis software
can be a bit more rough around the edges—especially when it comes to
documentation, ease-of-use, and nuanced feature support. That being
said, the utilities outlined here are amongst the cream of the free
software crop, so you shouldn’t have to roll up your sleeves and dive
into a technical support forum too often.
Ubuntu: Clean and fairly simple.
The cost of Windows licenses adds up quickly, whereas open-source
Linux costs nary a dime. Ubuntu is a pretty darn good operating system,
too, provided your workforce doesn’t mind abandoning the familiarity of
the traditional Windows desktop for more uncharted waters. The Linux
software selection is different than the Windows app lineup, but every
piece of software mentioned in this article—with the obvious exception
of Microsoft’s security suite—run just fine on Ubuntu.
While it’s often joked that Linux is near-impossible to use,
Canonical and a host of open-source enthusiasts have put a lot of work
into making Ubuntu extremely user friendly. We’d also argue that it’s
going to be equally frustrating to try and stuff Windows 8’s modern UI
into the business environment. And don’t even get us started about how
great it is to run Linux on low-powered systems that would wither and
choke at the mere sight of Microsoft’s main OS. But if you’re still not convinced…
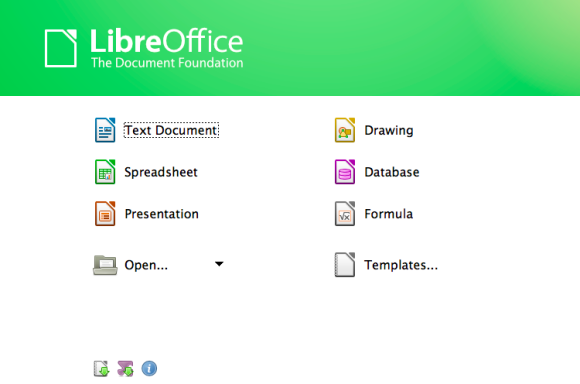
LibreOffice is composed of several modules, like Microsoft Office.
It’s fair to say that one of the biggest challenges businesses face
in abandoning the tried-and-true-(and-pricy) Microsoft Office suite for a freeware office package like
LibreOffice is compatibility. Specifically, the worries that newly
created documents or spreadsheets—whose extensions end with the letter
“x”—won’t work with LibreOffice and, even if they do, they won’t quite
look the same.
While it’s certainly true that there might be a couple of general
differences when opening up a Microsoft Excel spreadsheet in its
original app versus LibreOffice’s Calc, and that we’d much rather use
PowerPoint than LibreOffice’s more lackluster Impress (sorry!), the
suite’s Writer app is downright excellent, especially for its price. And
yes, LibreOffice Writer will open DOCX files, though you may run into
some slight formatting issues in documents with major bells and
whistles.
Our recommendation? If it’s not too much hassle, start saving your
key Word documents in older file formats that LibreOffice will have less
issues with—like Word 97-2003 documents, RTF or ODF (OpenDocument
Format) files—for fewer issues during your switch.
Windows 8 PCs ship with Windows Defender pre-installed.
Two security apps at once? Not quite, though this'll require a quick explanation.
In all versions of Windows prior to Windows 8, Windows Defender is an
anti-spyware app. It’s good to have, but not as mission critical as a
real-time virus scanner. Microsoft Security Essentials fills that role
in Windows XP, Vista, and Windows 7. For Windows 8, Microsoft merged AV
and anti-spyware apps into a single, unified program called—you guessed
it—Windows Defender. Got it?
While different kinds of businesses might need more robust security
options than Microsoft’s free solutions provide, there’s absolutely
nothing wrong with keeping Microsoft’s highly functional (and highly free)
antivirus app in your back pocket for any systems that need basic
protection. Just don't expect the apps to do a great job of reporting to
a centralized authority about viruses found or updates needed.
Another powerful app worth checking out is the free version of Comodo
Internet Security. With it, you can get the best of the aforementioned
Windows Defender and Microsoft Security Essentials in a single
app: Anti-spyware, firewall, and antivirus capabilities, automatic
sandboxing for locking out unknown files before they can do damage, and a
locking capability that keeps your critical Windows files from being
affected by problematic apps. Comodo frequently asks users to make
security decisions, however, whereas the Microsoft software works more
behind the scenes.
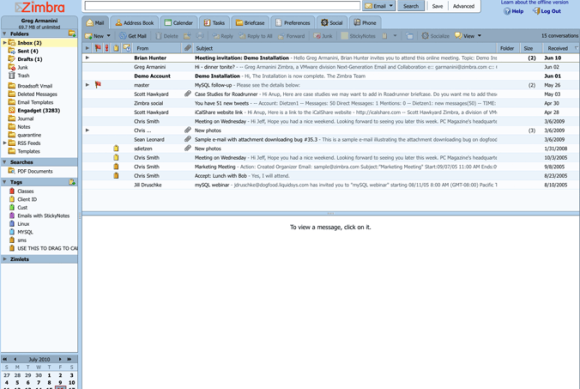
Zimbra Desktop does email, but also a lot more.
Since Mozilla’s Thunderbird is basically on life support at this
point, the world of “freeware alternatives to Microsoft Outlook” has
taken a hit. However, Zimbra Desktop offers a compelling suite of features as a desktop email client—especially for employees tasked with monitoring your business's social channels.
Zimbra Desktop includes all of the staple elements of a desktop email
client, such as a mail interface, a calendar, task lists, an offline
mode, et cetera. The app also includes a section that allows users to
keep tabs on social hotsposts like Twitter and Facebook; more
business-friendly services like WebEx and LinkedIn; and general services
like Yahoo Web Search and Local lookups.
Zimbra Desktop supports POP and IMAP email out of the box, along with
Yahoo Mail, Gmail, AOL, Hotmail and—of course—Zimbra Collaboration
Server accounts.
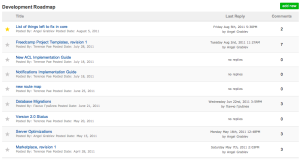
Freedcamp sounds a lot like Basecamp, doesn’t it? There's a reason
for that. This free project-tracking tool’s feature set has a lotin common with its costlier project tracking-counterpart.
If you’ve ever seen the Basecamp interface, you know what we’re
talking about. If not, here’s a crash course: Freedcamp allows you to
create projects, within which you can create and assign tasks to various
users within your organization. (Due dates appear on a separate
calendar.) When users log into their accounts, they’re presented with an
easy-to-digest dashboard featuring all the activity that’s going on
within a particular project, as well as to-do items and larger “Where
are we on the overall timeline?” milestone elements that define what
you’re working on. Users can even track their time on a particular task,
which comes in handy if your business bills by the hour.
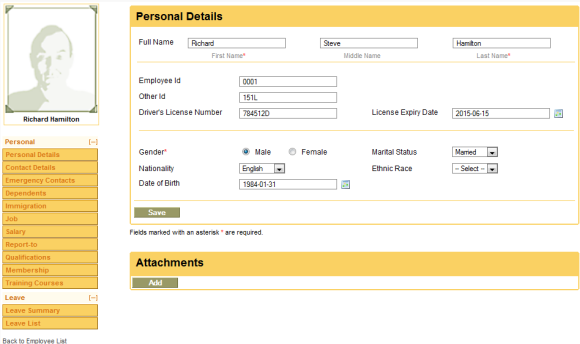
With a name like OrangeHRM, what color scheme did you expect?
Managing your human resources is critical in all but the smallest of
one-person businesses, and keeping track of your employees' information
in a thrown-together spreadsheet just won't cut it. That doesn't mean
you need to spend an arm and a leg on premium human resource management
software, however. OrangeHRM—a completely free and open-source HR
system—spins a number of common HR “modules” around a single,
centralized controller system.
In other words, functions such as the suite’s central employee
database, employee leave tracker, timekeeping module, job applicant
tracking system, and performance review system—to name but a few of the
available options—all tie into a single administration module that
allows a universal “admin” to assign out different rights and
permissions for the aforementioned features at will.
Sounds complicated? It’s not. The easy learning curve of OrangeHRM is
as big of a selling point as its comprehensiveness. If you need more
advanced features or don't want the hassle of maintaining HRM software
on your own hardware, however, a paid software as a service (Saas)
version is available. You can also pay for training or customized
software.
The free version of Weebly is good for creating a basic website.
If you know absolutely nothing about Web design but still want some
kind of Web presence that’s better than an about.me page or a default
parked domain page, Weebly’s your ticket.
The free version of this Web app allows you to create a simple
site—hosted by Weebly itself—that you build by dragging and dropping
various page elements over a variety of preset templates. While certain
parts of the templates are locked, you can grace editable sections with
paragraphs, pictures, contact forms, or even a little bit of custom HTML
if you’re so inclined. Fancier elements like embedding videos require a
premium Weebly account.
Not only can you have multiple pages on your site, but you can also
assign other users to act as editors for collaborative Web-building.
ZohoCRM helps you manage leads.
If your SMB really stresses the “S” bit—as in, you’d only need three
or fewer users for your customer relationship management software—then
ZohoCRM is the SaaS app for you. At its core, ZohoCRM helps businesses
keep track of customers (and potential customers), conduct email
marketing campaigns, capture opt-in lead generation, keep a finger on
the pulse of sales pipelines, manage sales opportunities, and more—all
through a single, easy-to-use Web interface.
ZohoCRM’s free version supports 100 megabytes of total storage and up to 100,000 records.
If you’re looking for more flexibility (or users) than the free
version of ZohoCRM provides, you can upgrade to a premium tier for a
reasonable price, or you might want to check out SugarCRM Community Edition.
It’s more powerful than the free version of ZohoCRM, but it also
requires hosting and setting up the software on your own server. You’ll
need a bit more technical expertise—and the willingness to take to the
robust SugarCRM help forums—to get this full-fledged tool up and running
smoothly.
GnuCash's UI is bland, but easy to use.
GnuCash is an open-source accounting program that uses a
checkbook-style interface to track basic incomes and expenditures. And,
because this app’s uses the double-billing accounting method,
it assists you in balancing your books by ensuring that your
cross-account transactions match up. In other words, money going in and
out has to match your business’ assets and liabilities.
GnuCash allows users to set up transactions and reminders on a highly customizable schedule. The software was built with small business accounting in mind,
complete with myriad report options (including profit and loss
statements), customer and vendor tracking, invoice management, check
printing, payroll management, and tons more. It does not, however, include dedicated inventory or POS tools.
MailChimp includes robust analytical tools.
MailChimp’s free as in “freemium,” but its gratisoffering is
actually pretty gracious. The free tier of this popular email marketing
management service lets you send up to 12,000 emails per month to a
list that’s no larger than 2,000 email addresses. In other words, you
can’t blast the world, but the typical small business can certainly
email a significant portion of its customer base.
The free version of MailChimp is relatively unrestricted when it
comes to creating and using templates, mailing to your subscribers
according to location, and using dynamic content to email
quasi-customized to different slices of your customer base. And no
matter whether you’re using MailChimp’s free or pro versions, you get
access to the app’s comprehensive reporting and A/B split testing.
This chapter explains how to install SystemRescueCD on a USB stick manually. If you prefer, you can order a pre-configured USB stick with the latest SystemRescueCd already on it from the popular osdisc website
Installing SystemRescueCd on an USB stick allows you to use the
system from a USB stick (mini hard disk) instead of using a CD-ROM. You
need a recent SystemResuceCD, and a USB stick with enough space. You
need at least 512 MB unless you have removed files from the official
version. Your BIOS must be able to boot from USB hard disks, and the USB
device must be defined before other devices in the boot devices order.
There is now an official SystemRescueCD installer for Windows
that you should use. This page explains how to install SystemRescueCD on
a USB stick. Many methods are possible. You should really follow one of
the three recommended methods (sections A, B, C). The other methods are
more complicated and are more likely to fail.
You may also be interested in making a backing store to keep your changes between reboots.
A) Recommended USB installation method from Linux
Overview
If you are running Linux on your computer it's very easy to install
SystemRescueCD on a USB stick. You just have to download the ISO image
of SystemRescueCD,
and then run a script which is at the root of the CD-ROM. You don't
have to burn the ISO image to a disc to do that, you just need to have
the ISO image available from a running Linux system. Formatting the USB
stick will remove all its content, so make sure you don't need the data
or make a backup first.
Download the SystemRescueCd-3.0.0 (or more recent) ISO image from the Download page
Mount the ISO image using the -o loop and -o exec options of the mount command
Plug in your USB stick and wait 5 seconds to allow enough time for the system to detect it
Unmount the USB stick if auto-mount is enabled or if it was already mounted
Run bash ./usb_inst.sh in a shell then select the correct USB device and press OK/Enter
Mount the CD-ROM ISO image
You first have to mount the ISO image (or a media where you have
burned it). You just need an empty directory on your system on which the
ISO image can be mounted. We will use /tmp/cdrom in this example but you can use any directory such as /mnt/cdrom:
mkdir -p /tmp/cdrom
mount -o loop,exec /path/to/systemrescuecd-x86-x.y.z.iso /tmp/cdrom
Plug in the USB stick
Just make sure the USB stick has been plugged in, and wait a few seconds to be sure the device has been detected by the system.
Execute the installer
Now you just have to execute the installation script which is at the
root of the CD-ROM. This script requires several commands to run but it
won't be a problem. To be sure the script will always work, these
commands are part of the CD-ROM:
cd /tmp/cdrom
bash ./usb_inst.sh
This script will show you a list of USB sticks detected on your
system. Only removable medias are in the list. This way it's not
possible to destroy a persistent device by accident.
Unmount the ISO image
Now you can unmount the ISO image
cd ~
umount /tmp/cdrom
B) Recommended USB installation method from Windows
If you are running Windows on your computer you can download and
execute a graphical installation program that will install
SystemRescueCd on a removable device. You have to download the ISO image
of SystemRescueCd since the installer needs it. It will extract all
files from the ISO image to a temp directory (called work directory) and
then you can customize these files, and finally use these files to
either recreate a new ISO image or install it on an USB device. The USB
stick must contain a FAT32 filesystem, which is the case in general if
you use your USB stick from computers running Windows. If it's not the
case you can just format the USB device again from the Windows explorer
(it will remove all files it contains). You have to run this program
with the Windows administrator privileges since the installer has to run
syslinux to make the removable device bootable. The partition must have
the "active" flag set for the boot to work.
The official SystemRescueCd installer for Windows is quite a
compact self-contained EXE program. It can be executed directly as it
requires no installation on the hard disk.
Download SystemRescueCd-3.0.0 (or more recent) ISO image from the Download page
Plug in your USB-stick and wait 5 seconds to allow enough time for the system to detect it
Format the USB stick with a FAT32 filesystem from the explorer
Create an empty work directory on the hard-disk (could be C:\Temp\sysresccd-workdir)
Execute the installer that you have just downloaded
Select the work directory which has been previously created
Select the original ISO image that you have downloaded previously
Select the USB stick in the removable device drop-down list
Click on the Install button to run the installation
If you have problems with the SystemRescueCd USB installer for Windows you can try linuxliveusb
C) Alternative USB installation method from the CD-ROM
Overview
If you boot the CD-ROM edition of SystemRescueCD (3.0.0 or more
recent), you can use it to install SystemRescueCD onto a USB stick. If
you have a Linux system on your computer you can also use the first
method, which does not require booting from a CD-ROM at all.
SystemRescueCD comes with a script to help you to detect the
right USB device and to install SystemRescueCD onto it. Formatting the
USB stick will remove all of its contents, so make sure you don't need
that contents, or make a backup first.
Download the most recent SystemRescueCD ISO image from the Download page
Burn it onto a CD-ROM. You can use software such as Nero or ImgBurn on Windows or cdrecord/wodim/k3b under Linux.
Boot from that CD-ROM with the default boot options.
Plug in your USB stick and wait 5 seconds to allow enough time for the system to detect it.
Type sysresccd-usbstick dialog in a shell then select the correct USB device and press OK/Enter
Instructions for manual installation
Instead of sysresccd-usbstick dialog you can also run the following commands by hand:
Run sysresccd-usbstick listdev to see which devices are seen as USB-sticks
Run sysresccd-usbstick writembr xxx where xxx is the name of the usb device
Run sysresccd-usbstick format xxx where xxx is the name of the partition on your device
Run sysresccd-usbstick copyfiles xxx where xxx is the name of the partition on your device
Run sysresccd-usbstick syslinux xxx where xxx is the name of the partition on your device
Example of manual installation
root@sysresccd % sysresccd-usbstick listdev
Device [/dev/sdb] [Kingston DataTraveler U3 ] is removable and size=957MB
Device [/dev/sdb] is not mounted
Device [/dev/sdb] has one partition: /dev/sdb1

root@sysresccd % sysresccd-usbstick writembr /dev/sdb
The device [/dev/sdb] seems to be big enough: 957 MB.
--> install-mbr /dev/sdb --force
--> parted -s /dev/sdb mklabel msdos
--> parted -s /dev/sdb mkpartfs primary fat32 0 100%
--> parted -s /dev/sdb set 1 boot on

root@sysresccd % sysresccd-usbstick format /dev/sdb1
The device [/dev/sdb1] seems to be big enough: 956 MB.
mkfs.vfat 2.11 (12 Mar 2005)
Partition /dev/sdb1 has been successfully formatted

root@sysresccd % sysresccd-usbstick copyfiles /dev/sdb1
The device [/dev/sdb1] seems to be big enough: 956 MB.
/dev/sdb1 successfully mounted on /mnt/usbstick
Free space on /mnt/usbstick is 956MB
Files have been successfully copied to /dev/sdb1

root@sysresccd % sysresccd-usbstick syslinux /dev/sdb1
syslinux has successfully prepared /dev/sdb1
D) Installation from Linux using an ext3/ext4 filesystem
If you are a Linux user, you may prefer having a Linux filesystem
such as ext3/ext4 instead of vfat on your USB stick. It should work with
any filesystem supported by GRUB such as ext3, reiserfs, ... In that
case you can use GRUB (legacy - version 0.9x) instead of syslinux to
boot. Thanks to Christian Hesse who suggested these instructions.
Format the USB stick from Linux using the normal mkfs tool that comes with your favorite filesystem
If you are using SystemRescueCD-1.2 or more recent, it's recommended
that you use an ext4 filesystem with the journal turned off (this is
possible with Linux >= 2.6.29). USB sticks are Flash filesystems and
this type of memory only supports a limited number of writes.
Journaling filesystems will make many writes at the same location (where
the journal is stored). Therefore, to extend the lifespan of the memory
we should limit the number of writes. Here is how to use ext4 with the
journaling turned off:
mke2fs -t ext4 -O ^has_journal /dev/sdf1
You could also use ext2 but it does not support extents, and then it
requires more accesses to read/write large files to the disk.
Mount this filesystem to /media/usbstick and copy the files from
your SystemRescueCD into this directory. (cf normal instructions)
Copy GRUB staging files from an existing GRUB installation: mkdir -p /media/usbstick/boot/grub ; cp -a /boot/grub/* /media/usbstick/boot/grub
Run grub-install --root-directory=/media/usbstick/ /dev/sdf (replace /dev/sdf with the name of your USB stick)
Create a menu.lst in /media/usbstick/boot/grub/. You have to replace (hd0,1) with the GRUB name of your USB partition.
timeout 5
color light-gray/black light-blue/black

title SystemRescueCd std-32bit
   kernel (hd0,1)/isolinux/rescuecd
   initrd (hd0,1)/isolinux/initram.igz

title SystemRescueCd std-64bit
   kernel (hd0,1)/isolinux/rescue64
   initrd (hd0,1)/isolinux/initram.igz

title SystemRescueCd alt-32bit
   kernel (hd0,1)/isolinux/altker32
   initrd (hd0,1)/isolinux/initram.igz

title SystemRescueCd alt-64bit
   kernel (hd0,1)/isolinux/altker64
   initrd (hd0,1)/isolinux/initram.igz

title MemTest+
    kernel (hd0,1)/isolinux/memtestp
    initrd (hd0,1)/bootdisk/initrd.cgz

title NT Password Editor
    kernel (hd0,1)/ntpasswd/vmlinuz
    initrd (hd0,1)/ntpasswd/initrd.cgz

title Gag
    kernel (hd0,1)/isolinux/memdisk
    initrd (hd0,1)/bootdisk/gag.img

title MHDD
    kernel (hd0,1)/isolinux/memdisk
    initrd (hd0,1)/bootdisk/mhdd.img

title Hardware Detection Tool
    kernel (hd0,1)/isolinux/memdisk
    initrd (hd0,1)/bootdisk/hdt.img

title Aida
    kernel (hd0,1)/isolinux/memdisk
    initrd (hd0,1)/bootdisk/aida.img

title Ranish Partition Manager
    kernel (hd0,1)/isolinux/memdisk
    initrd (hd0,1)/bootdisk/ranish.img

title FreeDOS
    kernel (hd0,1)/isolinux/memdisk
    initrd (hd0,1)/bootdisk/freedos.img
E) Manual installation from Linux using cp (deprecated)
This method is a bit complicated so you should really consider using
the automated installation script if you are running Linux. You can
follow it anyway if you know what you are doing, or if you want to make
extra customizations.
Step 1: Find the device name
You need the device of the USB stick. In most cases, Linux detects
this device as an SCSI hard disk. In other words, it is detected as /dev/sda1 (first partition of first SCSI device), or /dev/sdb1 if you have another SCSI device. Since kernel 2.6.8 USB sticks may be seen as /dev/uba, /dev/ubb, ...
Here is how you can find the device name. First, start your
computer under Linux with the USB stick unplugged. Then, load all USB
modules (you may need to load other USB modules first). This command
should not be required if the USB storage support is built-in in the
kernel. If modprobe can't find this module, it might be normal.
modprobe usb-storage
Now, you have to plug in your USB stick, and have a look at the kernel messages. You may find the device name using either dmesg | tail -n 50 or fsarchiver probe
Here is an example of a report from the kernel:
kernel: usb 1-7: new high speed USB device using ehci_hcd and address 5
kernel: usb 1-7: New USB device found, idVendor=1516, idProduct=1213
kernel: usb 1-7: New USB device strings: Mfr=1, Product=2, SerialNumber=3
kernel: usb 1-7: Product: DISK 2.0
kernel: usb 1-7: Manufacturer: USB
kernel: usb 1-7: SerialNumber: 0018F3218E76A9C0D2CF846A
kernel: usb 1-7: configuration #1 chosen from 1 choice
kernel: scsi6 : SCSI emulation for USB Mass Storage devices
kernel: scsi 6:0:0:0: Direct-Access    USB DISK 2.0    1.00 PQ: 0 ANSI: 2
kernel: sd 6:0:0:0: Attached scsi generic sg6 type 0
kernel: sd 6:0:0:0: [sdf] 16035840 512-byte logical blocks: (8.21 GB/7.64 GiB)
kernel: sd 6:0:0:0: [sdf] Write Protect is off
kernel: sd 6:0:0:0: [sdf] Assuming drive cache: write through
kernel: sd 6:0:0:0: [sdf] Assuming drive cache: write through
kernel: sdf: sdf1
kernel: sd 6:0:0:0: [sdf] Assuming drive cache: write through
kernel: sd 6:0:0:0: [sdf] Attached SCSI removable disk
Here you can see that fsarchiver probe reports all devices and partitions found on your system:
mkdir /mnt/usbstick
mount -t vfat /dev/sdf1 /mnt/usbstick
If there is not enough space left on the device (about 230 MB), you
will have to erase the current files (all data will be lost):
rm -rf /mnt/usbstick/*
In the next sections we will assume your stick is /dev/sdf. It's very important that you use the right device name.
Step 2: Reinitialization of the stick
The following instructions may not be required, it depends on how
your USB stick is configured. So you can try to skip this the first
time. In case of problems getting the USB stick to boot, you should
really try this. Confirm that you have a backup of the data that are on
your stick before you do this. Thanks to jadjay in the forums for this addition to the instructions.
We assume your device is /dev/sdf but you must replace it with the device name of your own USB stick. Be very sure that this is the correct device !
First, run cfdisk to check that the partition has the correct ID in the partition table of your USB stick. Select type LBA FAT32 may be 0B or 0C, to make it bootable.
cfdisk /dev/sdf
Use mkfs.vfat to format the partition. All data will be erased, so make sure you don't need the data which it contains.
mkfs.vfat -F 32 -n SYSRESC /dev/sdf1
The following dd command will overwrite the first 404 bytes of the MBR
of your stick. It will erase the previous boot instructions with the
default ones to make sure that it will work. It does not change anything
in the partition table since the partition table starts at offset 446
in the MBR.
dd if=/usr/share/syslinux/mbr.bin of=/dev/sdf
Synchronize to make sure that all the changes have been flushed to the disk.
sync
Step 3: Copy files from the CD-ROM
Now, you have to copy the most important files. The SystemRescueCD
disc must be mounted on /mnt/cdrom. You can mount the ISO file too, in
order to avoid burning a CD-R. The stick is mounted on /mnt/usbstick. Be
careful, according to a user in the forums the order matters:
You should check that you are using syslinux-4.05 or newer.
Now, you have to unmount the USB stick, and make it bootable with syslinux. Of course, you have to replace /dev/sdf1 with the device name of your stick:
umount /mnt/usbstick
syslinux /dev/sdf1
sync
A user reported that ms-sys -s /dev/sdX helps in case of problems. So you may consider that if you initially have a problem.
If you're using your
flash drive as a vehicle for simple file transfers, you’re missing out
on one of the single-best roles one of these wee data buckets can
fulfill. Indeed, hardcore enthusiasts know that simple flash drives are
perfect portable repositories for all the software that can breathe life into an otherwise ailing PC. All the web apps in the world
won’t help you when your PC breaks down or falls prey to a particularly
nasty piece of malware and refuses connect to the Internet. A properly
loaded USB drive, on the other hand, can be a machine saver. And when
your grandma calls with a dire PC emergency, you'll be glad to have an
always-ready "ninja drive" to slip into your pocket as you run out the
door.
In this article we’ll show you how to load out a USB drive with
everything you need in case of a PC emergency. So next time your
computer breaks down, don’t panic. Instead, take a deep breath, plug in
your ninja drive, and start making things right.
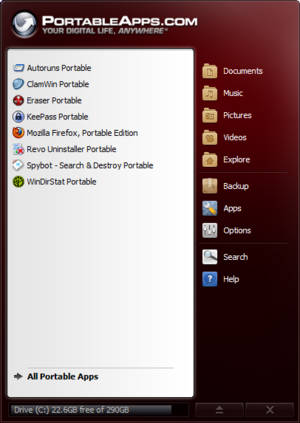
The Portable apps UI.
The first thing you’ll want to install on your drive is
PortableApps—a free, open source platform for installing desktop
applications on removable media, like a USB drive. PortableApps manages
the installation of new portable software on your USB drive, and also
acts as a frontend when you’re actually using the USB drive, letting you
easily browse and launch applications.
PortableApps maintains a list of hundreds “portable” versions of
popular free programs, designed to work without installation. You can find the full list here.
Each of the following apps with the word “Portable” in their title is
available for the PortableApps platform. You can download them at the
links provided, or just start PortableApps and click on Apps > Get More Apps. You’ll see a large list of applications appear. Just check the ones you want and click Next to download and install them all automatically.
Even though it’s not a maintenance application, strictly speaking, a
mobile browser is a great inclusion on your emergency thumb drive. Why? A
lot of malware targets your web browser, so it’s one of the most likely
components of your system to be out of commission, or otherwise
compromised. Chrome's sandboxing security feature and Safe Browsing
functionality—which guards against malicious websites and downloads—make
it one of the better options for mucking around on a potentially
infected system.
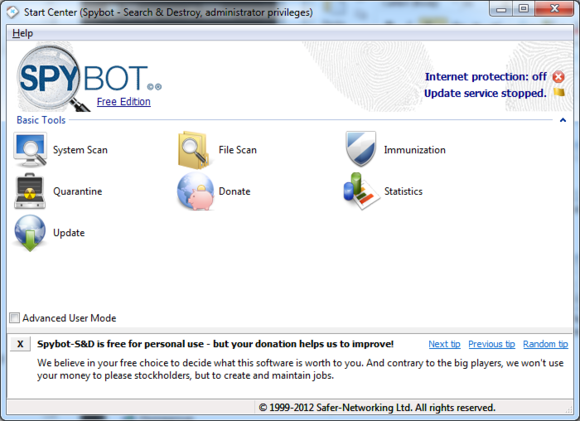
Spybot ain't fancy, but it works well.
If your computer is running slow because of malware, Spybot S&D
should be the first (and often last) weapon in your arsenal. It’s one of
the oldest and best spyware removal suites around, and should be able
to weed out most malware on even the slowest of machines.
ClamWin is a Windows graphical interface for the Clam open source
antivirus engine. It doesn’t provide real-time scanning like you’d get
in an installed antivirus application, but the portable versions
provides powerful on-demand virus scanning for any suspicious files.
Many unofficial tech support geeks consider Malwarebytes to be a
go-to malware scanning solution, but it doesn't offer a portable
version. You can, however, save the Malwarebytes installation file to
your emergency drive and unpack the app directly onto the maligned PC
after you've taken a first pass at badware using ClamWin and Spybot
portable. A second opinion never hurts when you're dealing with viruses.
When you need to root out stubborn malware, a rootkit detector does the trick.
If you’ve tried running malware removal programs like Spybot Search
and Destroy but your computer is still exhibiting malware symptoms like
bogus error messages and browser hijacking, you might be dealing with a
rootkit. Rootkits are designed to conceal malware running on your
system, and can be very hard to detect themselves. If you suspect your
computer might be infected with one, try running TDSSKiller, a rootkit
scanner from Kaspersky. Just leave the .exe file on your thumb drive,
and run it on the infected computer—it will find and remove most rootkit
malware.
Even if you’re not trying to uninstall whole programs, deleting files
can prove to be a challenge—especially when you're dealing with an
infected system. Windows might tell you that access is denied to a file,
or that another program or user is currently using it, or otherwise
tell you that the file you want gone isn’t going anywhere at all.
FileAssassin lets you get around those roadblocks, and delete any
file you want. Make sure you really want it gone, though, because it’s
going to be.
When you snag the program, make sure to grab the portable version, at the bottom of the download list.
Sometimes the problem isn’t that you can’t delete a file, it’s that you want to make sure that it’s really, really gone.
If you need to securely delete sensitive documents or files, use
Eraser—an application for securely erasing and overwriting files and
directories stored on standard mechanical hard drives. You can also user
Eraser to overwrite all the empty space on a disk, making sure anything
you’ve deleted in the past is truly gone.
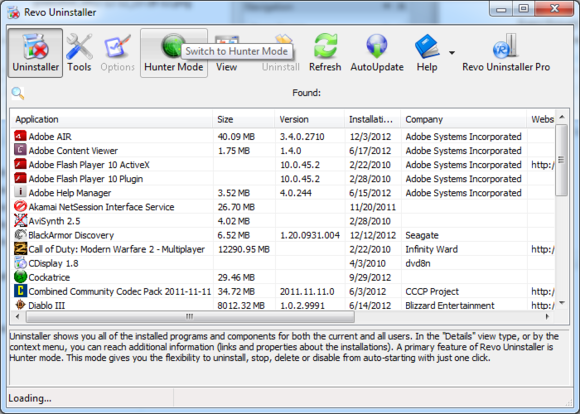
Revo Uninstaller makes uninstalling lots of programs a breeze.
One of the simplest ways to get a gridlocked computer running faster
is to remove programs that you don’t need. This has two benefits: you
clear up hard disk space, which can speed up your computer, and you
reduce the number of apps running at startup, which can make your boot
time shorter. You can uninstall programs by hand, but that’s slow going
and the programs aren’t always completely removed. Instead, keep a
portable copy of Revo Uninstaller handy to quickly and completely
uninstall as many programs as you want.
One of the main reasons that older systems gradually slow down is the
accumulation of programs and services set to automatically run at
startup. Autoruns is a powerful app from Sysinternals that shows you
every single process that will start with your computer, along with
other common sources of trouble, including browser toolbars and shell
extensions. Telling a process to not run at startup is as simple as
unchecking a box.
If you use KeePass to store your passwords (and if you don’t, you
should think about it), it’s not a bad idea to keep your KeePass install
and password database on a thumb drive. That way, you’ll always be able
to access your online accounts, no matter what computer you’re on. Even
better, you don’t have to worry about identity theft if you lose the
USB drive, because the Keepass database is encrypted and requires a
master password. Be careful about logging in to potentially infected
computers with KeePass, though.
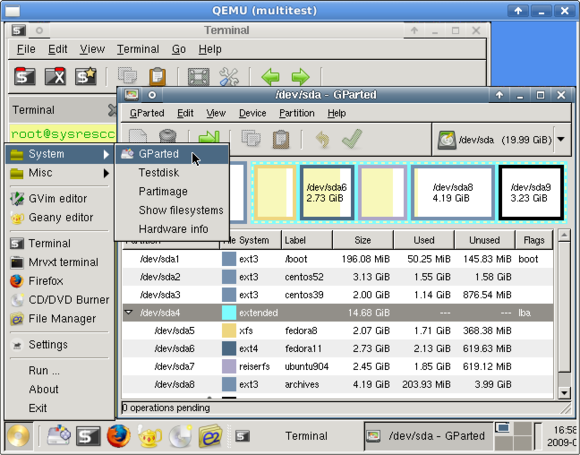
SystemRescueCD: Perfect for that oh-so-bonked PC.
If you want to be really, truly prepared for a PC disaster, you can
go one step further than just creating an emergency app thumb drive. By
loading up a second drive with a Live install of the SystemRescueCD
operating system, you’ll be prepared even if your computer’s OS is so
FUBARed that you can’t even log in.
SystemRescueCD is a free live operating system, meaning you don’t
have to install it on a hard drive. Just insert the SystemRescueCD USB
drive into the computer, restart, and boot from the thumb drive. The
Linux-based operating comes equipped with software that you can use to
access the data on your hard drives and back it up across the network,
along with various other handy-dandy utilities—basically, everything you
need to fix (or at least recover) as much of your broken OS as
possible. The makers of the distribution were even kind enough to
provide step-by-step instructions on how to get a SystemRescueCD live drive up and running.